I took advantage of the CV19 shutdown to finally built a fibreglass subwoofer enclosure for my Tesla Model S. I probably could have found the time during a normal weekend, but the process does involve at least half a day of the initial fibreglass work to cure in the vehicle. It wasn’t until the shutdown that my family and I were not going to drive it somewhere during the weekend. Here is the first post in this series that provides the overall detail of the project.
The new enclosure locates the sub in the rear left in the wheel well. It is similar to the enclosure as a part of the NVX Model S kit or the interesting Audio Design stacked-wood enclosure. But neither of these are readily available in Australia. Even though I have built dozens of MDF subwoofer enclosures over the years I had only used resin once and that was to make some door pods (fabric over rings mounted to a shaped board) this was the first time making a fibreglass enclosure in a vehicle.
The first step involve a time consuming process of taping up the space where the enclosure would sit so I could lay the fibreglass in place. After all the taping as above I used the plastic wrapping from a recent Ikea purchase to cover most of the rear hatch area in plastic to make sure there were no resin spills.
The ‘base’ of the enclosure is actually sitting above the floor of the wheel well. I created the below cardboard panel to sit just below the outer edge of the subframe. It was trial and error to achieve the correct contour. I created by using two sections which made it simpler to make mistakes and try again.

The fibreglassing process requires patience and a bit of planning. I used about 75% of a 1kg kit from Bunnings to make the initial layers of fibreglass. I chopped the 1m square mat into strips and a few little squares.
The enclosure cured in the car overnight. A word of warning, this will make the car I then removed the cured enclosure from the car and added an additional layer. I bought some fibreglass matting in bulk from eBay and used an additional 500ml of resin. This added an additional couple of layers to the inside and I caught any areas I missed with the initial layers.

The next step was creating a mounting baffle for the sub. There are two approaches to this. The first approach involves stretching fabric over a ring that is securely but minimally mounted to the fibreglass enclosure and then using resin and more fibreglass to solidify the fabric. I took the second approach which is create a simple MDF baffle and fibreglass the interior edge to the existing fibreglass enclosure.

There was a process of sanding down the edges and smoothing the baffle so as to fit snuggly but also so the enclosure could be removed relatively easily. The trickiest section was getting the curving top edge right. This basically involved sanding and then test fitting until I was happy. The initial dimensions were slightly too big and it made removal quite difficult. Some gradual sanding reduce the dimensions along the curved edge and made it less difficult (albeit not easy) to remove.
The subwoofer speaker wire enters the bottom via a ‘Large Round Push Connector Speaker Terminal’.
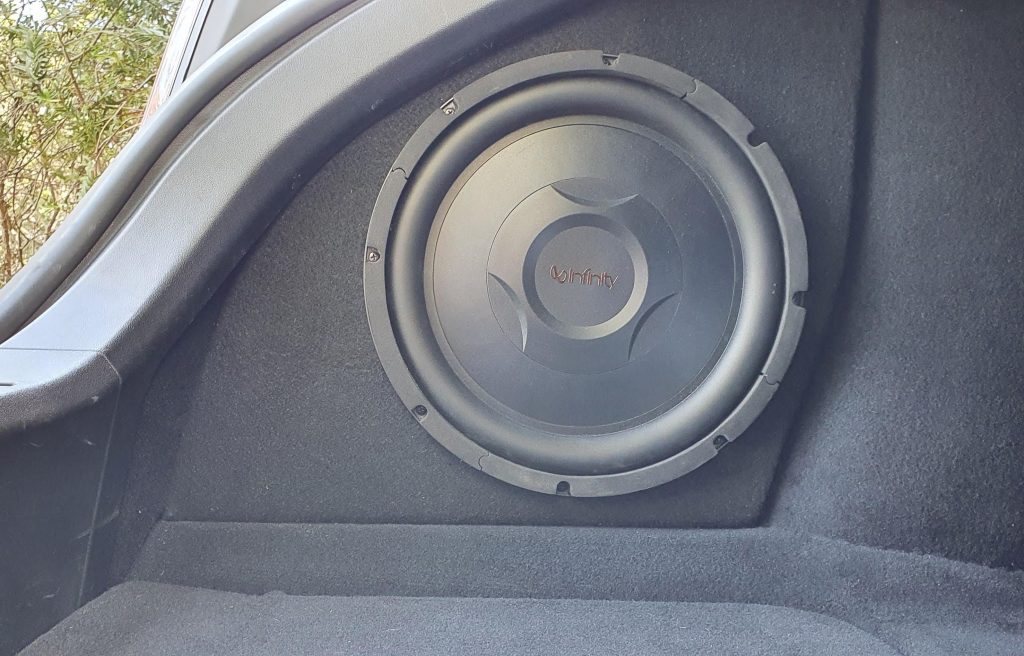
Second last step involved pillaging an old pillow and lined the interior of the enclosure to further increase the virtual size. The final step involved carpeting the baffle to match the black carpet of the hatch/trunk.
The subwoofer is a shallow-mount Infinity REF1200S 12in. It is 4 or 2 ohm selectable. It provides plenty of volume. So much so I had to use the last strips of the Dynamat to deaden the hatch trim and panels because they were vibrating too much.
The amplifier mount sits in the boot sub-floor and is designed to secure the amp and tidy up the cabling. Photos to come.