This is the first post in documenting the audio project for my Tesla Model S. The project has proceeded through various phases as I have found the time to complete them.
The vehicle was fitted with standard sound (no second amplifier or factory sub) and came with an all-in-one powered subwoofer from the previous owner. This had OK sound quality but had poor volume while on the road. I wanted good quality sound and enough volume to really kick. So I designed a system around good sound quality and volume and a graduated installation when I had time. (This process has also been interrupted by the news of Tesla offering a service to upgrade MCU 1 vehicles with the latter model and better designed MCU 2, as I don’t want to have to remove components that are time intensive to install or add to the costs.)
The system design takes into account all available information I could find about Tesla audio installations. This includes useful videos on installation of door speakers (overall system, front doors and rear doors) and amplifier installation. Another useful Tesla-specific video includes how to access the 12 volt battery. For this project I also planned and installed sound-deadening in doors and the boot, so I investigated various ‘how to’ videos about that (like this one). The project was designed to proceed in at least three phases. The titles below link to subsequent detailed posts:

Phase 1: Door Speakers and Sound Deadening, Sub and Amplifier replacement
Dismantled each door, removed the trim and factory sound proofing. Front doors were sound deadened with the Dynamat 10435 Xtreme Door Kit. Front speakers are the Infinity Kappa 60.11CS. Rear door speakers are JBL 6520 club series coaxials. Original Tesla drivers were cut out from their frames and used to mount the new speakers assemblies.This took a bit of courage for the first speaker, but it works extremely well. (Familiarity with the door dismantling procedure came in handy when I replaced one of the handles.)
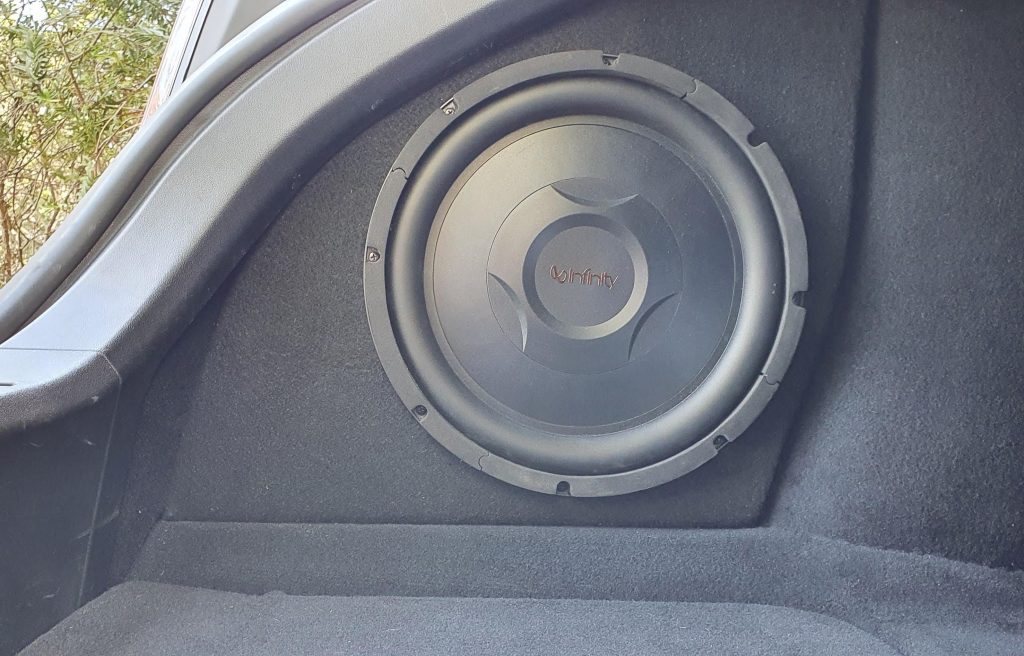
A small MDF-based enclosure was built to house the shallow-mount Infinity REF1200S 12in sub. I used the existing power and speaker-level input wiring from the previous sub installation to install a Pioneer GM-D9705 5-channel amplifier. Currently only the subwoofer channel is utilised.
Phase 2: Amp Mount and Fibreglass Sub Enclosure
I built a new enclosure for the sub in the rear left area. It is similar to the enclosure as a part of the NVX Model S kit or the interesting Audio Design stacked-wood enclosure. But neither of these are readily available in Australia. Even though I have built dozens of MDF subwoofer enclosures over the years I had only used resin once and that was to make some door pods (fabric over rings mounted to a shaped board) this was the first time making a fibreglass enclosure in a vehicle.
The amplifier mount sits in the boot sub-floor and is designed to secure the amp and tidy up the cabling.
Phase 3: DSP and 5-channel amplification
As a part of the overall design of the system I planned on some kind of sound processing. If mono-block amplifiers were cheaper then I would have gone with the same Pioneer DEQ-S1000A universal sound processor and a mono-block amplifier as the DEQ-S1000A has a small but efficient built-in amplifier. But that didn’t make much sense when the 5 channel amp was only slightly more expensive. The goal is to used the GM-D9705 for amplification and the DEQ-S1000A for sound processing. This plan has been waylaid by Tesla’s announcement about MCU 2.0. It likely shouldn’t effect the MCU 2.0 swap but I don’t want to add unnecessary costs.
The first two phases click through to additional posts with detail and photos of the installation.
Comments are closed.